Magento website: Magento is eminently a powerful eCommerce platform that can fulfil the requirement of small, medium, and large-scale online businesses all across the globe. It is a highly extensible, user-friendly, and adaptable platform.
One of the distinct features of this platform is the artistry to develop diverse websites or stores from the same platform. It also allows the multiple front-stores to share a common backend and base. Thus it makes the process of administration easier.
Hence, it is a great choice for the store owners who manage or own multiple installations of Magento.
Benefits of having multiple stores for a business
A multi-store allows you to have one or numerous parts of the cart system. This allows the user to navigate or purchase the services and products on the internet quickly and easily. Secondly, you can set numerous stores under one single domain. Thus, conveniently one can sell their products/ services at different places at the same time.
Prerequisites
- For Magento website development, Install Magento.
- Access to virtual host (vhosts) option. For instance, cPanel (control panel) supports this.
URL structure
Indeed, even before you intend to add new stores to Magento, you should have a way and understanding of how each store must be addressed. To be more precise, you must be unequivocal about what your URL must look like. You must basically follow three approaches:-
- Domain (for example, www.store2.com and www.store1.com)
- Subdomain ( for instance, store2.mystore.com and store1.mystore.com)
- Folder ( for example, mystore.com/store2/ and mystore.com/store1/)
The structure of the store totally depends upon one’s personal choice and the steps one follows (this will be more or less the same). Normally, a subdomain is often used to develop different versions of the area-specific store (for example en.mybestshop.com and es.mybestshop.com).
Note:- It is always a wise decision to hire expertise for the Magento website development, because they will have skills, good programming and data-base integrating knowledge, etc. They can perform all the complex codings with accuracy.
Below mentioned are some common terms that are used in website stores.
Website: It is akin related to the entities of the business and setting for taxes, payment gateways, shipping, and many more.
Store: It is a section where you can designate an exact catalog of products or services. This is a space where we differentiate the stores on the basis of products / services you offer.
Store View: It is most commonly used to handle different types of languages on the site. For each language, you can have a Store View.
Configuration of server
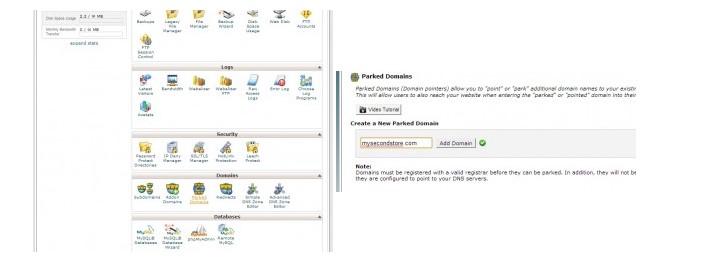
Before we develop a new store of Magento, we must always make sure to configure domain or subdomain. It fully depends upon the control panel and web servers.For this example, we are assuming the server is controlled on the “cPanel” control panel and Apache Web Server. We can use features of Parked Domain in cPanel, this will add the additional domains. The Parked domains are very much similar to aliases, hence it will resolve to the directories of the same file automatically.
On the off chance if you are willing to pick the strategies for the subdomain, ensure you create it and guide them towards the directory where your Magento is installed.
Develop the storefronts
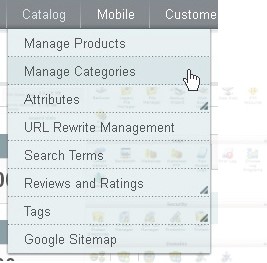
To develop a multi-functionality store, you must develop the new store/stores in the Admin Panel of Magneto. In the menu, click “Catalog” and tap “Manage Categories”.
Then tap Add Root Category.
Next, fill your name in the name field and tap your store name. Under the section “Is Anchor” choose “Yes”
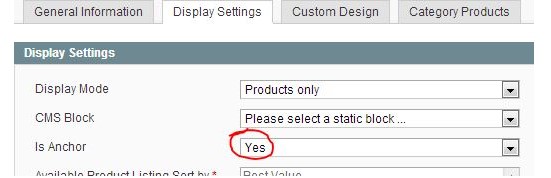
And then go to, “Save category”.
Configuration of stores
Before we configure our store, it is essential to understand the concept of store views, stores, and websites. If you are looking for a completely separate site that does not share the shipping methods, currencies, share cart, then it is always better that you go for a separate view.
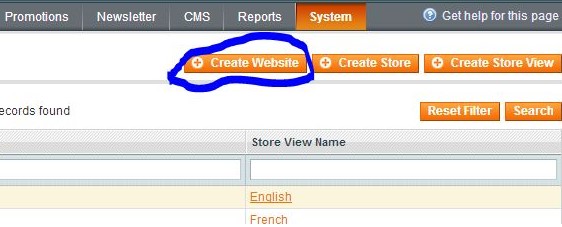
Click Systems and Manage store. Go to “Create website” and enter the information (If you are planning for a separate site, skip this step).
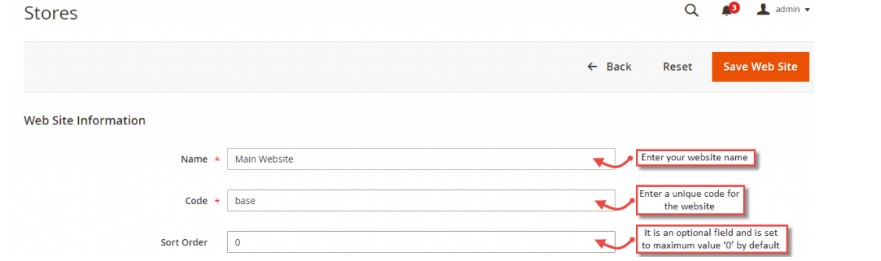
In the field provided, fill your store name and enter your unique string. Make sure that you do not insert any space in between. Remember this code for further use.
Tap “Save Website” when you are ready with your details.
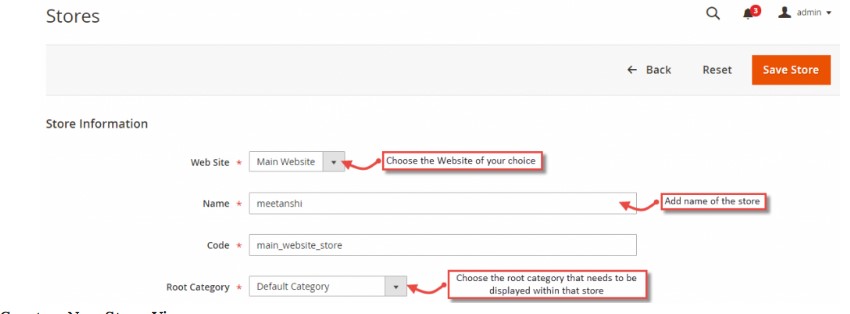
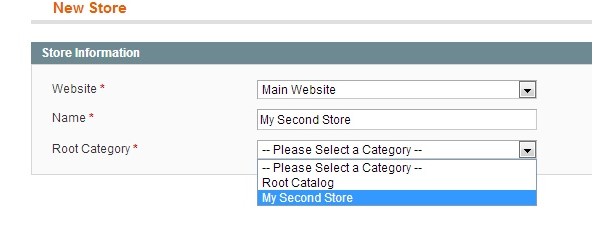
To create a store, tap “create store” and fill the following fields.
- Website: Choose the site which you have just developed from the dropdown.
- Name: Fill the store name.
- Root category: Choose the category which you have developed in the prior step.

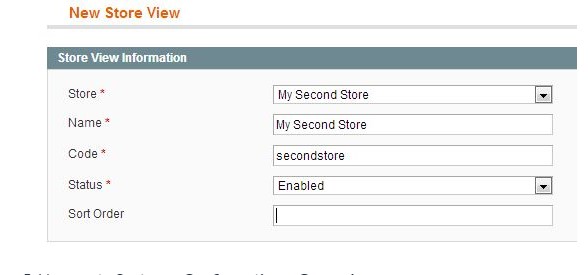
For Store view, tap “Create Store view” and follow the below-mentioned instructions:-
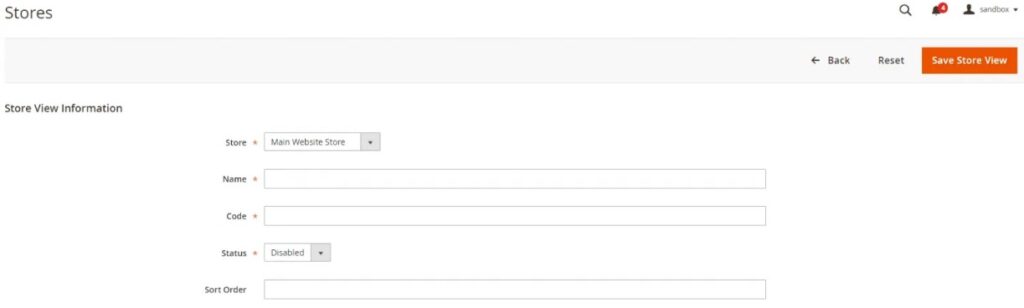
- Store: Choose the store that you have developed in the previous step.
- Name: Fill your name (desired) in the field provided for store view.
- Code: Fill your unique identifier in the field provided for store view. Make sure that you jot down this code somewhere as you might need it later.
Note:- This is where you can include additional store views for each language set-up.
Now when you are done, tap “Systems” and “Configuration” then click “General”.
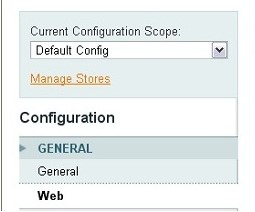
Check if you have selected “Default Config” as your Current Configuration Scope.
On the tab “Web”, make sure you set “Auto-redirect to Base URL” and set it as “No” and tap “Save Config”.
Now, move the Configuration Scope dropdown to a recently created site.
Under the field ”Web”, make sure that you alter the settings of “Unsecure Base URL “and “Secure Base URL’. Make sure you uncheck the store view “Use Default” and supplant the URL’s with your matching domain name. Do not forget to enclose the trailing/.
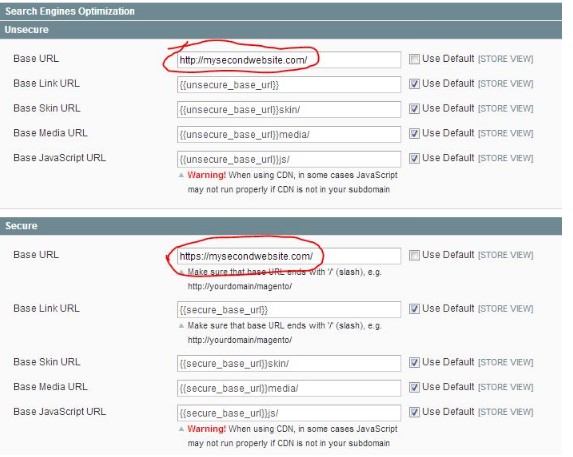
And then tap “Save Configuration”. This will finish the configuration of your new store.
(Repeat the above-mentioned steps to develop additional stores).
Domain mapping
By now we have already enclosed all the additional domains to the server and later followed the configuration steps of the new Magento store We have to glue them together and notify Magento to launch the store of your choice which is totally based upon the domain name.
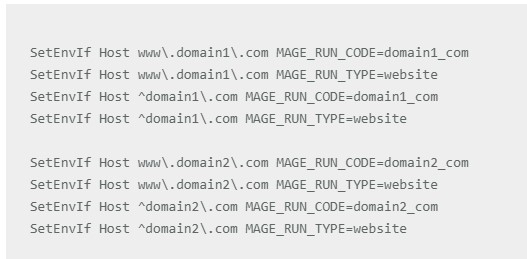
- Open the .htaccess file on the server, which is located in the root directory of the Magento installation, under your favourite text editor. In the control panel, you can use the File Manager.
- Add the below-mentioned lines and replace it with the actual names of the domains.
Please Note:-
Web Servers such as LiteSpeed do not support SetEnvlf. In this scenario, you can set your store code in the following way:-
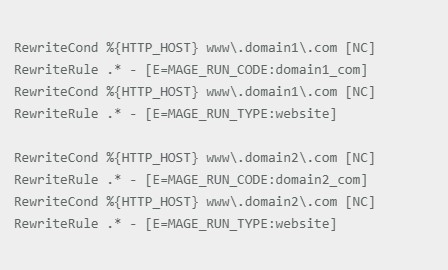
MAGE_RUN_CODE – It is a chosen unique code, which you attained while developing the Store view/Magento website.
MAGE_RUN_TYPE – It totally depends upon the Store view or specific website. Make sure that you set your store or website respectively. Do not forget to add an entry for each domain.
- Save file: Make sure in the new website you navigate and visualize if the Magento store is loaded correctly or not. If it is not so, make sure MAGE_RUN_CODE matches with the code that was developed earlier and the domain resolves to the right path/folder.
Summing it up!!
If you want to avoid any drawbacks before processing into a Magento solution for multi-store:-
- Consider checking the resources of your server, as the XML tree has to be developed for all websites. It is good that you handle logically to administer the dedicated servers with significant requirements to meet all the demands.
- Do not forget to concentrate on SEO, as the duplicate content can harm your hard-work.
Also read: How To Determine Actual Cost Of Ecommerce Website Designing?