Information about SSD Initialization
SSD, shot for solid-state drive, is a popular storage device among users for its excellent performance compared with traditional hard disk drive, such as faster data transfer speed, better durability and lighter weight. Users are willing to purchase SSDs even though the price is not cheap. You should be told to initialize the brand new SSD before putting it into use. But do you know how to initialize SSD in Windows? Which partition style suits SSD? In the following content, you may find the answer.
In general, SSD initialization is not common. But you need to do it in some cases:
- The SSD is new. You have to initialize it before using.
- You get the error message Disk unknown not initialized in Disk Management.
• Some system errors happen. You are required an SSD initialization process.
Pay attention:
① If the SSD (needing to be initialized) saves data, please make backup in advance to avoid data loss.
② If the SSD capacity is larger than 2TB, you’d better initialize it to GPT.
③ You can only initialize SSD first, and then format it.
3 Methods to Initialize SSD Windows 10/8/7
Here, I’d like to share you with 3 ways to initialize SSD in a safe way. If you prepare to initialize an SSD, please go on reading.
Method 1: Initialize SSD with Diskpart
Diskpart is a Windows basic utility that allows you to manage partitions and drives with command lines. It’s often chosen to initialize an SSD that contains data. Let’s see how to initialize SSD with it.
1. Press the Windows + R keys together to open Run window.
2. Type cmd in it and press Enter to open Command Prompt.
3. Type diskpart and press Enter key.
4. Type following command lines orderly. Press Enter after each command.
• list disk
- select disk *
- clean
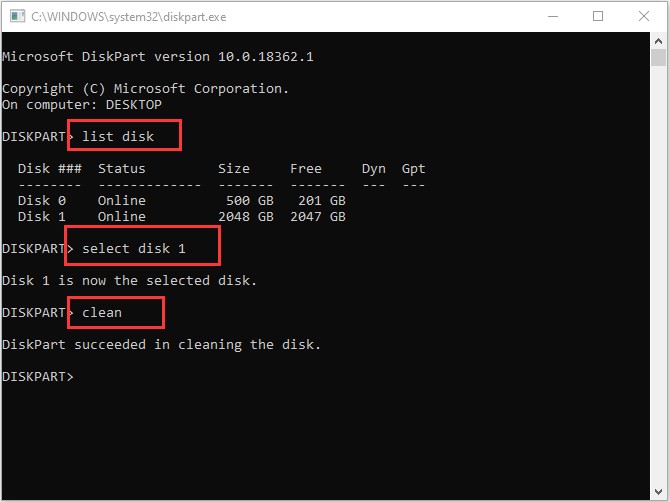
Symbol * represents the number of the target SSD. This Clean command tells computer to make the first 1MB and the last 1MB of the SSD zeroed.
By adopting the Clean command for the SSD, the first 1MB and the last 1MB of the disk will be zeroed, so that any disk formatting will be erased.
Then, you can go to Disk Management and find this SSD, which will be shown as Unknown not initialized. Now, this SSD is available for initialize. It’s time to initialize it in Disk Management.
Method 2: Initialize SSD with Disk Management
Disk Management is the most commonly used way to manage disk and partition. When you add an SSD to computer, a window will come into sight to prompt you need to initialize the disk before Disk Manager accessing it. Please follow these steps to accomplish the initialization.
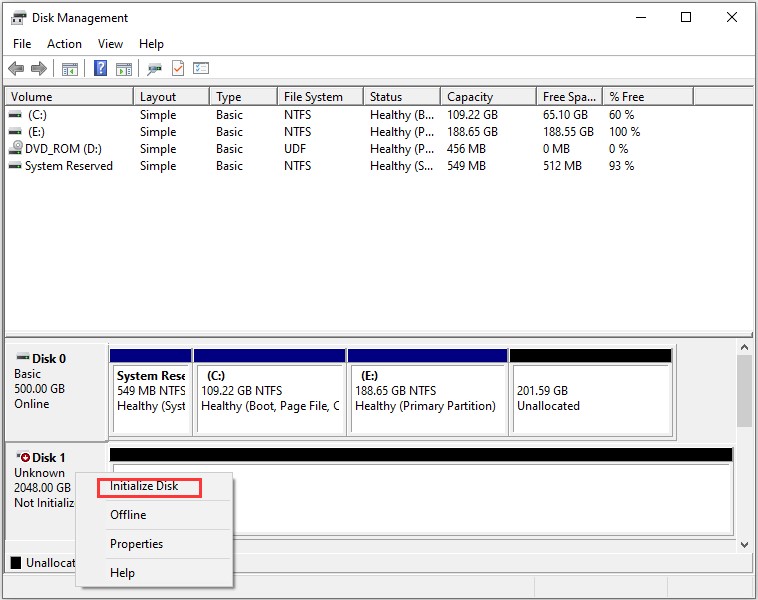
1. Press Windows + X keys together to invoke Start menu. Choose Disk Management to open.
2. Find the target SSD and right click it. Choose Initialize Disk option.
3. Choose MBR or GPT for the SSDC. Click OK to confirm.
This method applies to initialize a disk that is brand new. You can’t find the Initialize Disk option for a used SSD when you right click on it.
Method 3: Initialize SSD with Disk Manager Software
Choosing a third-party disk manager is an easier way to install an SSD, especially when you are not familiar with the command lines, or disk Management can’t help you. After all, the command lines are hard to remember and easy to input incorrectly.
You can try MiniTool Partition Wizard. It will enable you to install SSD (for both new and used) and change partition type free with ease.
Here is a tutorial of SSD initialization with Partition Wizard in Windows 10.
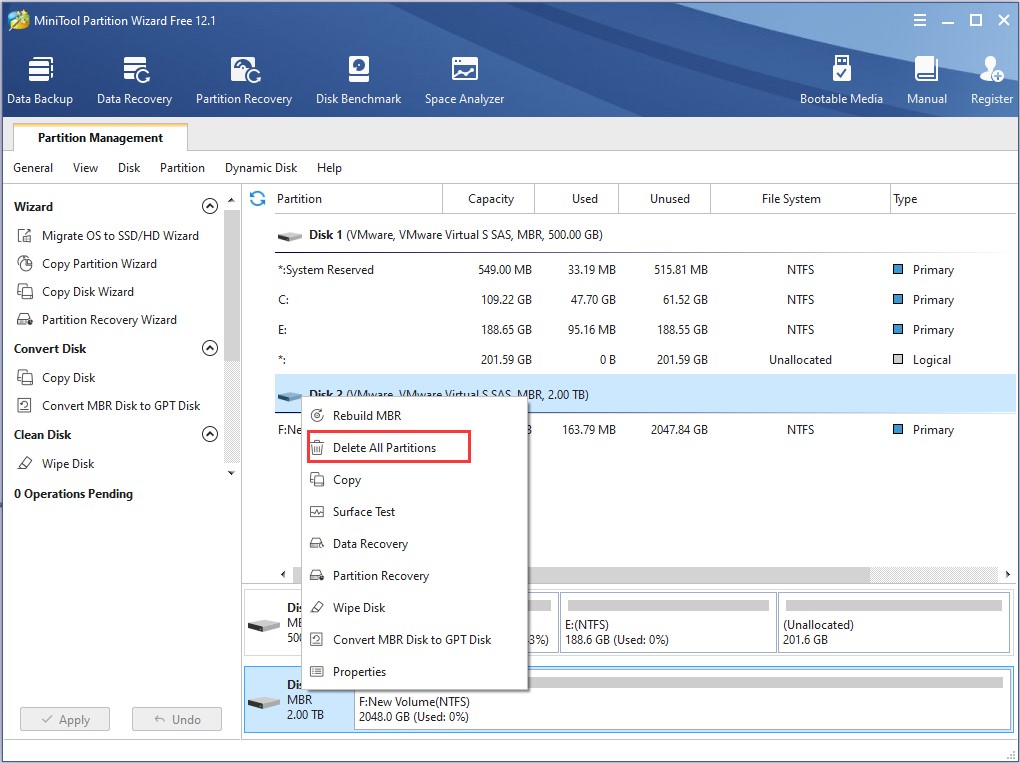
1. Download and install this software on your Windows 10. Open it to get the main interface.
2. Right click the target SSD and select Delete All Partitions option from the menu. Ignore the warning notification and click OK.
3. Right click the SSD again and select Initialize to GPT Disk. Or you can see Initialize to MBR Disk option if it is already GPT.
4. Click Apply button.
Tip: Recover Data after SSD Initialization
Is it possible to recover data from the initialized SSD? How to do it? If you initialized the used SSD without making a backup, how terrible it is.
As mentioned above, initialization will remove all the data on the SSD. If you need to data from an initialized SSD, you may continue trying Partition Wizard.
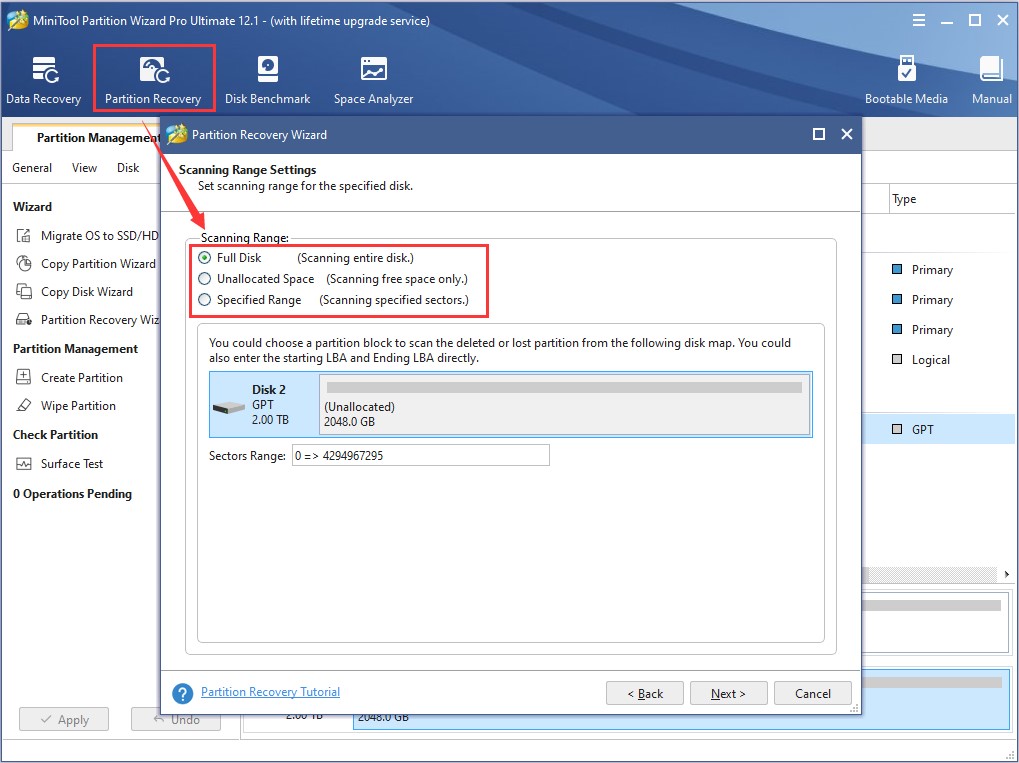
1. Click Partition Recovery on the tool bar.
2. Choose the target disk and click Next. Select a scanning range.
3. Click Quick Scan to continue. Then, all scanned partitions will be displayed. Select the needed partitions to recover. Click Finish.
4. Click Apply in the main interface to confirm the changes.
It’s hard to say whether you can recover data from initialized SSD successfully. But if there is hope, you may have a try.
Final Words
This article has introduced 3 simple ways to initialize an SSD in Windows: via diskpart, Disk Management and Partition Wizard (with which you can recover lost partitions). Now, you can select a proper method to begin to initialize on your own.
Hope you can accomplish it easily and securely. We will appreciate it if you are willing to share your experience or thoughts with us in the following comment zone.
Also Read: 7 Best VPN Services for All Devices