Your hard drive has all your important files, and suddenly it’s not showing up on your desktop. Don’t panic — you’re not alone, and in most cases, there is a fixable reason behind it. Whether it’s an external drive, internal HDD, or a new SSD you just installed, there are a variety of reasons why your system might not be recognizing it. In this comprehensive troubleshooting guide, we’ll go through the most common issues and step-by-step solutions to help you get that drive back where it belongs — on your desktop.
Step 1: Check Physical Connections
Before diving into software fixes, it’s always wise to start with the basics. A faulty cable or loose connection could be the only thing standing between you and your drive.
- For external drives: Make sure the USB or Thunderbolt cable is properly plugged in. Try a different port or cable to rule out hardware defects.
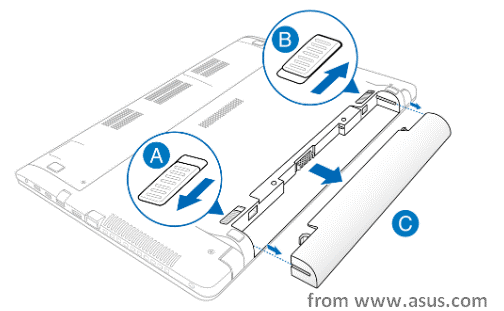
- For internal drives: If you’re comfortable opening your PC or accessing the hard drive bay on your laptop, make sure the SATA or NVMe connections are secure. You may need to reseat the cables.
If you hear the drive spinning or notice indicator lights turning on, chances are it’s at least getting power. Otherwise, consider using a powered USB hub or checking if the drive works on another computer.
Step 2: Look for the Drive in Disk Management (Windows)
If the drive isn’t showing up on your desktop but is getting power, check Windows Disk Management:
- Press Windows + X and choose Disk Management.
- Look for drives that are listed but not assigned a drive letter.
If you see your drive listed here but without a letter or showing as Unallocated, the system is seeing the device, but it hasn’t been set up to display.
What to Do:
- Right-click the unlettered partition and choose Change Drive Letter and Paths…
- Click Add or Change and choose an available letter.
If it shows as unallocated, right-click and choose New Simple Volume to format and assign it.
Step 3: Use Disk Utility (Mac)
On Mac systems, external drives that don’t show on your desktop may still appear in Disk Utility.
- Open Applications > Utilities > Disk Utility.
- Look on the left sidebar for a list of attached volumes.
If your drive shows up but is greyed out, try mounting it manually:
- Select the drive volume and click the Mount button at the top.
If the drive refuses to mount, it might be formatted in a format that macOS doesn’t support or recognize — such as NTFS.
Tip:
Go to Finder Preferences > General and ensure the box for External Disks is checked so they display on the desktop when mounted.
Step 4: Update or Reinstall Disk Drivers
In some cases, especially with brand new external hard drives, your system may not have the necessary drivers installed.
On Windows:
- Open Device Manager (right-click the Start menu).
- Expand Disk Drives and look for your device.
- If you see a yellow warning sign, right-click and choose Update Driver.
- If updating doesn’t help, try Uninstall, then unplug and replug the device to force reinstallation.
On Mac:
macOS drivers are usually handled automatically. If your drive is not compatible, you may need third-party software like Paragon NTFS or Tuxera to access non-native file systems.
Step 5: Check for Partition or File System Errors
Drives that aren’t formatted or have corrupted partitions may still appear in disk management tools but won’t show up on the desktop.
Solution for Windows:
Use the built-in CHKDSK tool:
chkdsk E: /f /r(Replace E: with the appropriate drive letter)
Solution for Mac:
Use Disk Utility’s First Aid feature:
- Select the drive and click First Aid.
- Let macOS scan and fix any errors it finds.

Step 6: Try Another PC or Mac
If the drive still doesn’t show up, testing it on a different machine can help isolate the issue. If it mounts successfully on another system, your original device may have conflicting settings or outdated OS-level drivers.
If it doesn’t appear anywhere, the problem likely lies with the drive itself.
Step 7: Data Recovery Options (If All Else Fails)
If the drive is detected but inaccessible, or if you’ve accidentally deleted a partition, there are powerful data recovery tools available:
- Recuva (Windows)
- EaseUS Data Recovery (Windows & Mac)
- Disk Drill (Mac & Windows)
These tools can help recover files from corrupted or lost partitions before you attempt to reformat the drive.
Preventing Future Issues
Whether you’re working with external or internal drives, follow these tips to avoid complications down the line:
- Safely eject drives before unplugging them.
- Keep drivers and OS updated to ensure maximum compatibility.
- Backup important data regularly. Cloud storage or another backup drive can save you in a pinch.
- Run periodic checks using CHKDSK or First Aid to maintain drive health.
Final Thoughts
A hard drive that won’t show up on your desktop can trigger panic, especially when it holds critical data. But most of the time, there’s a logical — and fixable — explanation. From simple cable checks to formatting and driver updates, these steps should help you get back on track.
If the drive continues to remain invisible even after trying every suggestion, it could be a hardware failure. In that case, contacting a professional data recovery service may be your best bet, especially if the data is irreplaceable.
Remember, staying proactive with regular maintenance and backups is the best defense against hard drive nightmares. Don’t wait for a failure — prepare for it beforehand!

