Color is like the secret sauce of filmmaking. It sets the vibe, tells a story, and makes scenes jump off the screen. Behind all that magic is a tool many cinematographers love: DaVinci Resolve.
TLDR: DaVinci Resolve is a favorite among cinematographers for color grading because it offers powerful tools, a node-based workflow, and pro-level control—for free. It’s intuitive yet advanced, allowing artists to get super creative. Plus, it handles massive files and formats with ease. From indie filmmakers to Hollywood pros, it’s the go-to.
What Is DaVinci Resolve Anyway?
DaVinci Resolve is software made by Blackmagic Design. It started as a high-end color grading tool used in post-production houses. But now? It’s a complete editing suite with video editing, visual effects, and sound, all packed into one.
Despite all those features, color grading is still its main superpower.
Why Cinematographers Love It
Let’s dig into why so many cinematographers swear by DaVinci Resolve.
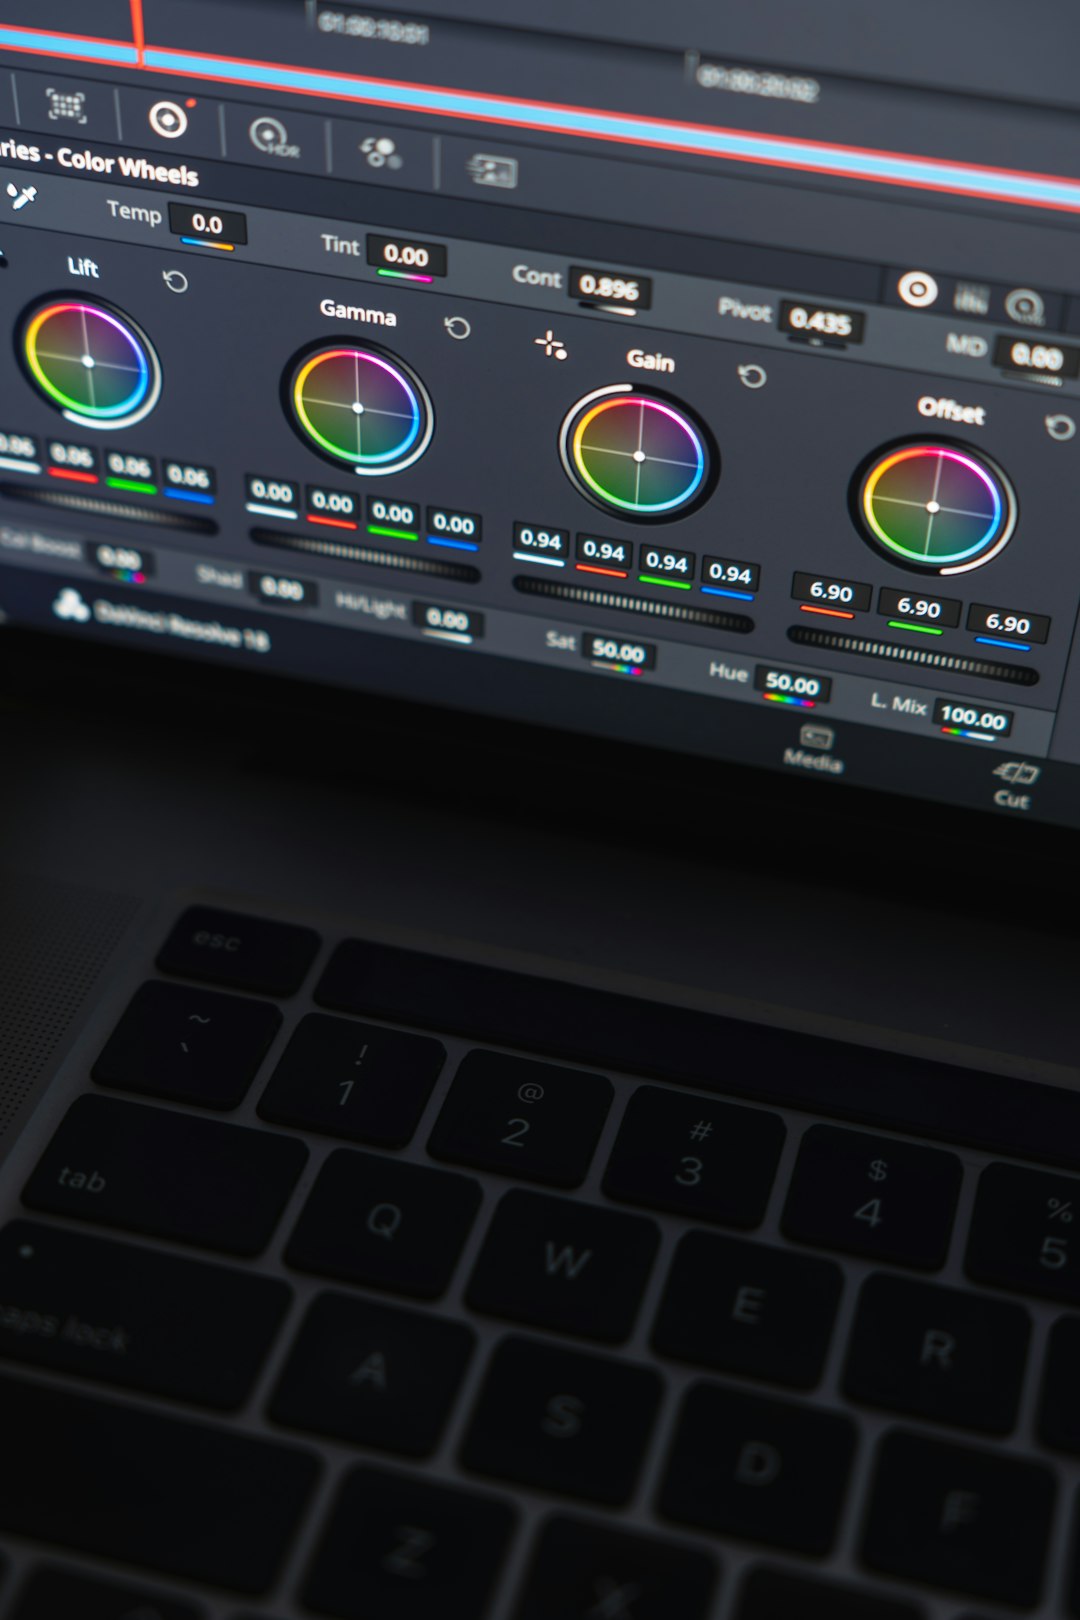
1. It’s Built for Color
DaVinci Resolve was literally born for color correction and grading. That means every tool is purpose-built to help cinematographers tweak colors just the way they envision.
Whether it’s correcting a greenish tint or adding warm golden-hour vibes, Resolve makes it easy—and fun.
2. Node-Based Workflow
This is a big one. Most programs use a layer-based system. Resolve uses nodes.
Think of nodes like Lego bricks. Each node handles one part of your correction or effect. You can stack them, link them, even loop them. It gives you ultimate control without getting messy.
This structure allows cinematographers to:
- Work non-destructively
- Organize complex looks clearly
- Apply changes at specific stages
3. Powerful Scopes
Scopes are like radar for your eyes. Resolve has amazing built-in scopes—waveform, vectorscope, histogram—anything you need to judge color, contrast, and exposure.
Instead of guessing what looks right, filmmakers can measure it. This is extra handy for matching shots or meeting broadcast standards.
4. RAW and Log Formats Made Easy
Professionals shoot in RAW or Log formats to get more dynamic range. Resolve loves these formats. It handles RED, Blackmagic RAW, ProRes, ARRIRAW—you name it.
It also has built-in color management (like ACES and DaVinci Color Science) to turn flat video into gorgeous footage fast—without frying your brain.
5. Incredible LUT Support
LUTs (Look-Up Tables) are like Instagram filters on steroids. Resolve uses them beautifully. You can import custom LUTs, make your own, and even tweak them live.
This is great when cinematographers want consistent looks across scenes or projects.
6. Real-Time Playback
No one likes watching their computer struggle. Resolve is optimized like a champ.
Even working with 4K footage, you can play back color grades in real time—no waiting, no stuttering. And if your machine is older, there are options like Proxy Mode and caching to keep things smooth.
Professional Yet Accessible
One big reason cinematographers flock to Resolve is simple:
It’s free.
Yes, DaVinci Resolve has a free version that’s incredibly generous. You only need to pay for Resolve Studio (the pro version) if you need higher-end features like 3D tools, noise reduction, and more GPU-acceleration.
But for most indie filmmakers and YouTubers? The free version is more than enough.
Hollywood Uses It — A Lot
DaVinci Resolve isn’t just for enthusiasts. Major studios use it too. Movies like “La La Land”, “Mad Max: Fury Road”, and “Avatar: The Way of Water” were all color graded using Resolve.
Knowing that the very same tools are available to indie creators is inspiring. It levels the playing field.
Image not found in postmetaCollaboration Made Easy
Working with other artists? Resolve is built for that.
Its separate Pages—Edit, Color, Fairlight (sound), Fusion (FX)—let different team members work on the same project at the same time. This is huge for bigger productions.
And the Color Page is isolated for clarity, so colorists and cinematographers can focus just on grading, without distractions.
Magic Masking and AI Tools
Here’s where it gets geeky—in a good way.
Resolve has AI-powered tools that can track faces, isolate subjects, or remove backgrounds automatically. The Magic Mask feature is a fan favorite.
Want to brighten someone’s face but leave the background alone? Easy. Select, track, tweak—done.
These features save hours of manual masking.
Grades You Can Reuse
Resolve lets you save PowerGrades. Think of these like preset looks you can apply to future projects. You can also copy grades from one shot to another with a click.
Perfect for matching scenes across an entire shoot.
Film Emulation Looks
Modern digital footage is clean and sharp. Sometimes too clean. Cinematographers often love the grit and charm of old film.
Resolve lets users mimic film stocks using plugins or LUTs. Whether it’s Kodak 2383 or Fuji 3513, you can build that retro style right into your grade.
It turns sterile digital images into cinematic gems.
Reliable and Constantly Evolving
Blackmagic Design updates Resolve regularly. And most updates bring big new features. Not bug fixes—real tools that people need.
This makes the software feel alive and exciting. As your skills grow, Resolve grows with you.
Wrap-Up: The Cinematographer’s Playground
At its core, DaVinci Resolve is built for artists who care about how movies feel. It lets cinematographers take their raw footage and mold it into something beautiful, emotional, and unforgettable.
Color isn’t just a post-production chore—it’s a storytelling tool. And Resolve makes it sing.
Quick Recap: Why Cinematographers Prefer DaVinci Resolve
- It’s purpose-built for color grading
- Offers node-based, pro-level control
- Handles pro formats easily
- Works on massive projects and indie films alike
- Includes powerful AI tools and LUT support
- It’s free to start and scales with your needs
So whether you’re shooting your first music video or finishing your tenth feature film, DaVinci Resolve gives your vision the colors it deserves.